Surface Roughness
Participate in no-burr technology with the e-ion or with the use of GoldenBlue® tools. Importance
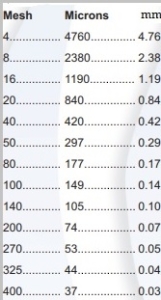
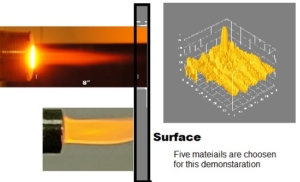
Role of the Cascade e-Ion Plasma Plume The Cascade e-Ion Plasma is a versatile machine that enhances the surface texture and roughness of metals, ceramics, and soft plastics. It allows for rapid “deburring” and surface creation by utilizing specific ions and adjusting conditions for different materials, including titanium, steel, cobalt, and PEEK. For more details, you can contact the manufacturer, MHI. The e-Ion Plasma™ operates in multiple modes, enabling deburring, ionic co-deposition for altering surface porosity, and thermal action in various combinations for optimal surface treatment. Studies are ongoing to improve the smoothness of glasses, semiconductors, and hard materials like carbides and nitrides, as well as composite alloy applications. When comparing deburring processes, consider factors such as speed, reliability, precision, energy efficiency, and environmental impact. Traditional methods like drilling and polishing can damage materials due to focused stresses. In contrast, the e-Ion Plasma process uses only air and electricity, making it noiseless and efficient, with a compact design suitable for tabletop use. The Cascade e-Ion Plasma also offers benefits such as integrating rapid “deburring” with surface nitriding and bulk sintering, known as 4DSintering®, without requiring line-of-sight beams. It can facilitate simultaneous ion peening and weld smoothing, improving corrosion resistance while minimizing the risk of introducing cracks. For more information on the e-Ion depositor attachment, which further reduces surface roughness, please contact us. Example: Starting from the surface with a Ra = 20-40um, for unsintered powder metallurgy produced alloy part for an alloy that sinters around 1700K, a Ra = 4um surface is easily obtained in minutes to an hour of non-line-of-sight surface e-Ion “deburring” operation. Multiple parts can be made simultaneously. The production cost saving per part is substantial when comparing 1 hour vs. three days of labor time. The savings from lessened environmental degradation are substantial. The energy savings per year could be thousands of dollars in benefits. Please contact MHI for more precise calculations and to work with you to ensure the best amortization cost for your specific location. Please Contact Us for more information on the best surface finish for metals, ceramics, glass, oxides, garnets, silicon carbide, and many other materials that require nanoscale or microscale smoothening or manipulation. Mesh sizes
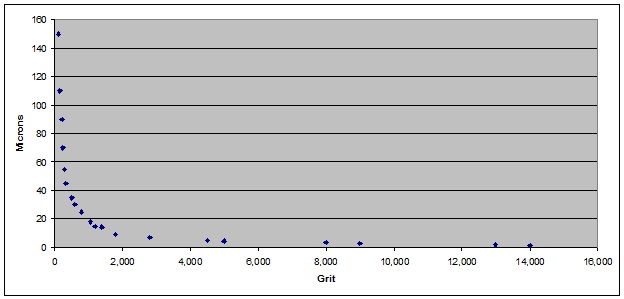
Conversion Grit to Microns
| High energy and high-velocity e-Ion Plasma™ CleanElectricFlame® can be used for deburring surface operations within seconds or minutes for the biomedical parts (entire surface), casting, forging, or powder-metallurgy fabricated parts. Curved and non-line-of-sight regions can be treated. The Scale of Roughness Texture (Related to the resolving power required of the measurement probe, with light ~ 0.5 microns, with electrons and AFM, theoretically, it is ~ 0.1 nanometer (nm)) Deepest ocean trench: 10.994 Km Highest mountain: 8.850 Km Human scale: ~1 m Human organ scale: ~10 cm Spoons and forks that fit a human mouth: ~1 cm Pencil tip: ~1 mm Grain of salt: ~0.1-1 mm Human hair or dust mites: ~0.1 mm Bacterium: ~1-10 micrometer (the typical size of the autocorrelation length features on a smooth surface) Phages (bacterial virus): ~0.1 micrometers (this is the industrial level of polish in the 21st Century) Large molecules or virus: ~10-100 nm Atoms: ~0.1-1 nm (most commonly used materials are comprised of atoms with diameters in the 0.1 nm range) Water molecule: 0.275 nm Nucleons: ~10^-6 nm Electrons: ~10^-7 nm Planck’s length: ~10^-26 nm (smallest scale believed to exist in space-time)
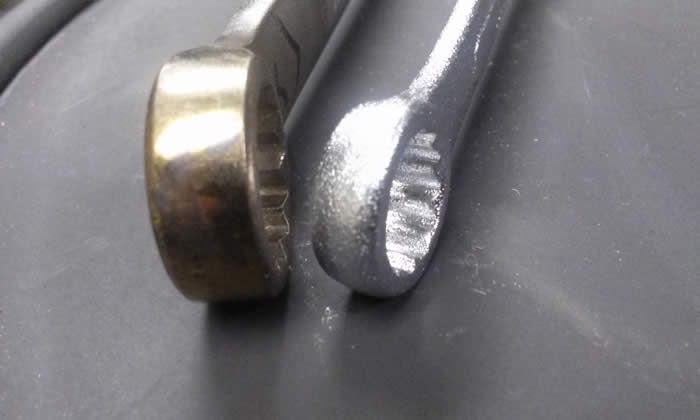
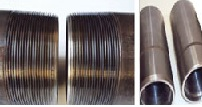
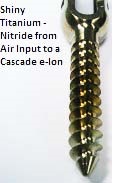
Other texture properties: The ACF, the auto-correlation function, measures how similar the texture is at a given distance from the original location. If the ACF rapidly becomes zero along a given direction, the surface becomes “uncorrelated” with the starting measurement location. The Sal (also called ACL or ß) is the Auto-correlation length, a measure of the distance over the surface such that the new location will have a minimal correlation with the original location. For anisotropic surface texture, the direction along the surface of the ACL is the one that has the lowest ACL value. The STR, which ranges from 0-1 for anisotropic to isotropic, is a measure of spatial isotropy. Spacial isotropy STR~1 is an excellent feature, except in specific directional tools. The word “lay” is also used in the metal machining literature to indicate surface anisotropy, but this is best to have a repeatable hierarchical scale across many length scales. Contact MHI for more information on Shannon and other proofs and how we can recommend technology companies that can do measurements for you. ————————————– The value of Hardness depends on the material and processing conditions. The measurement of Hardness also depends on the strain rate sensitivity of the harness. Thus, the hardness measurement does not always represent hardness when used in dynamic conditions. Please contact MHI for high Hardness, low distortion, and tunable coefficient of friction surfaces with the highest Str. What is the Magnitude of Possible Energy Savings: An astounding ~23% of the world’s total energy consumption (greater than 575 ExaJ/Y) (Exa = 10^18) originates from tribological contacts. About 20% of this total energy (~114 EJ/Y) is used to overcome friction, and ~3% (~17EJ/Y) is used to remanufacture worn parts and spare equipment (Friction 5(3): 263–284, ISSN 2223-7690, 2017). Most friction pairs in use are estimated to be from contacts that are about 50% metallic (bearings, bushings, and rotary components). New technologies are reducing dry friction considerably (Tunable coefficient of friction with surface texturing in materials engineering and biological systems Current Opinion in Chemical Engineering, vol.19, p. 94-106, 2018) On the left is nitrided and deburred. On the right is the surface before the deburring. The expected operating cost is a few cents per part, but please Contact Us for your specific application. Easily nitride Ti-Al-V (Ti64) with the Cascade e-Ion Plasma Plume Please Contact Us for your specific application. MHI offers complex part manipulators, from robotic arms to continuous belts Before e-Ion Ra= 20um » After treatment Ra= 4um surface shown above.
|
Contact Us
Micropyretics Heaters International Inc.
750 Redna Terrace Cincinnati OH 45215

Telephone: 513-772-0404
Alt Telephone Number: 513-286-1222
Alternate Mobile Number for WhatsApp 513-237-7755
Fax: 513-672-3333
Copyright MHI Inc., USA, 1995-2026

